Buying your first RV opens up a world of travel freedom, scenic camping spots, and cozy nights on the road. But before hitting the highway, you’ll likely find yourself researching accessories that make the experience more comfortable and practical. One of the most underrated yet essential additions is a slide out awning —a protective cover that sits above your RV’s slide-out to shield it from the elements. If you’re just starting out, installing one may seem like a big job, but it’s completely manageable with the right approach and preparation.
In this guide, we’ll walk through key tips for first-time RV owners who want to install a slide-out awning properly and confidently, ensuring lasting protection and fewer headaches down the line.
Understanding the Role of Slide Out Awnings
Before diving into installation, it helps to understand what these awnings actually do. A slide-out extends the living space of your RV, but when left uncovered, the top of that extension becomes vulnerable to falling leaves, water, dirt, and even sun damage. Over time, buildup can affect the seal, lead to water intrusion, or cause damage when the slide-out is retracted with debris still on top.
A slide-out awning solves this problem by acting as a self-retracting cover that rolls in and out with your slide. It keeps the area clean and dry, minimizing maintenance while helping extend the life of your RV components.
Choose the Right Awning for Your Setup
Before you purchase anything, measure your slide-out’s width and extension depth. Most awnings are sold based on the width of the slide-out, and it’s essential to select one that overlaps slightly on each side to offer full coverage. Double-check the mounting area above your slide-out—make sure there’s enough room for the awning hardware, and verify that your walls and framing can support the weight.
Take into account fabric and frame materials. Acrylic is ideal for ventilation and UV resistance, while vinyl offers better waterproofing. Frames are typically aluminum for a balance of strength and lightness. Choose a trusted brand with a strong warranty and clear installation instructions.
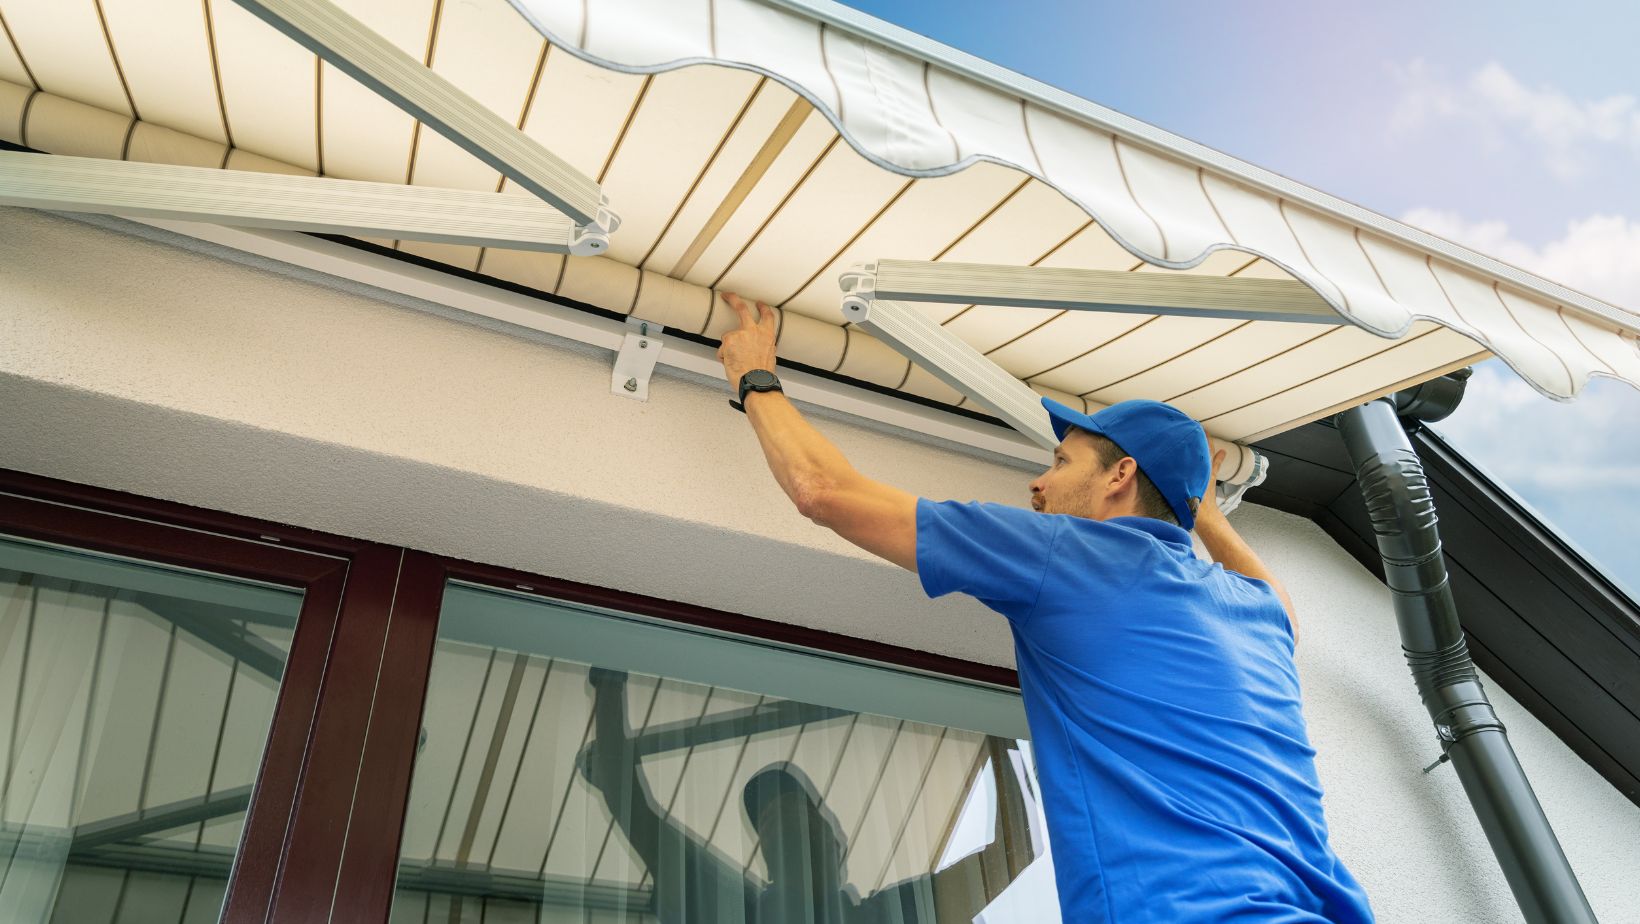
Get Familiar with the Installation Process
Once your awning arrives, carefully review the manufacturer’s manual. Every model is a little different, and knowing what tools you’ll need—and which steps require two people—will make the process much smoother.
In general, installation will involve the following steps:
- Marking the mounting locations
- Installing the awning rail
- Attaching the roller tube
- Securing the side arms
- Testing the slide-out mechanism for smooth operation
Many first-time RV owners opt to install the awning themselves. Still, it’s smart to call a professional if you’re uncomfortable working on a ladder, drilling into the RV exterior, or handling tension-loaded springs.
Some RV service centers will install aftermarket awnings even if you didn’t purchase them through the dealer.
Enlist a Second Set of Hands
Installing an awning isn’t a one-person job, especially when handling the roller tube and aligning brackets. Find someone who can assist you throughout the process. Help speeds things up and reduces the risk of dropping parts or misaligning the awning frame.
During installation, one person should steady the awning or roller tube while the other secures hardware or tightens bolts. Communication is key here—go slow, check alignment often, and don’t rush the steps that require precision.
Use the Right Tools and Sealants
You don’t need a full workshop to install your awning, but having the correct tools will make the job much easier. At a minimum, you’ll need a power drill, measuring tape, level, sealant (usually butyl tape or RV-grade silicone), and the hardware provided with the awning kit.
Sealant is especially important. Every drilled hole or screw must be properly sealed to prevent water from seeping into your RV’s walls. Don’t skip this step, even if the weather is dry during installation—it’s a small task that can prevent big repairs later. And while protecting your RV physically is critical, don’t overlook financial protection too. If you’re traveling through or living in the Mountain West, consider getting coverage like RV Insurance Montana to safeguard your vehicle from unexpected mishaps on the road.
Test the Mechanism Carefully
Once the awning is installed, it’s time to test it out. Extend and retract the slide-out a few times to ensure the awning deploys and rolls back correctly. Check for snags, misalignments, or fabric tension issues. The awning should be taut but not overly stretched.
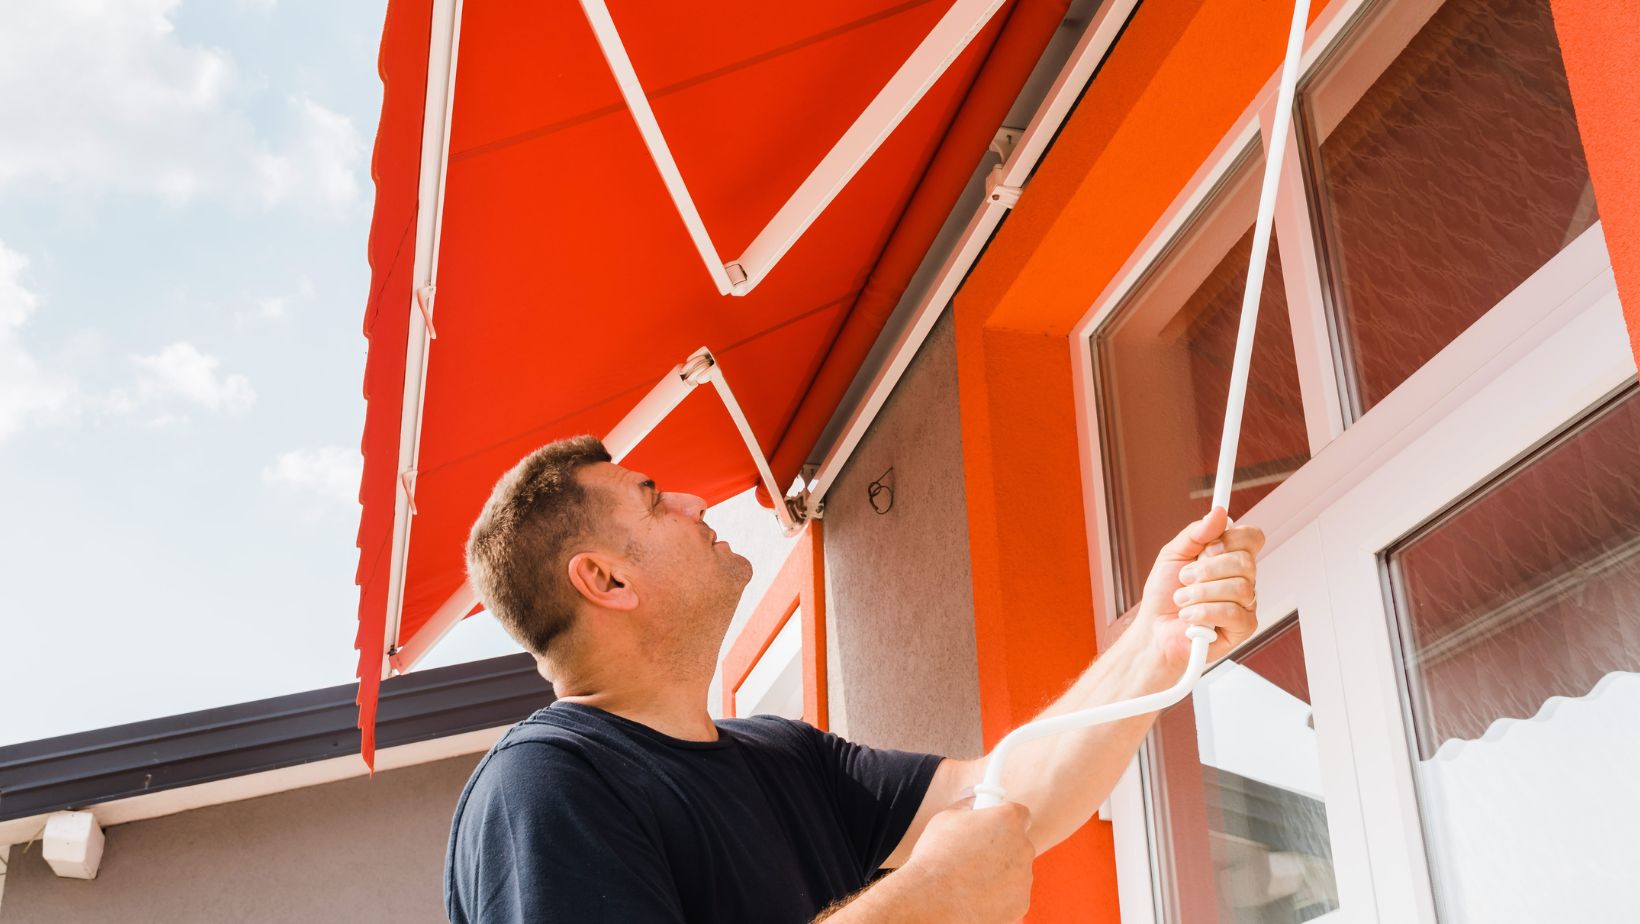
Also, check that water rolls off properly when extended. Adjust the pitch or tension according to the manufacturer’s instructions if it pools or dips. This is also a good time to ensure nothing interferes with the awning arms or mounting points.
Care and Maintenance After Installation
After a successful installation, it’s important to keep your slide out awning in good condition. Clean the fabric regularly using mild soap and water. Inspect the mounting hardware for rust or loosening after long drives or seasonal changes. Keep tree sap, dirt, and debris from collecting on the fabric when extended.
Retract the awning during high winds or storms to prevent tearing or hardware strain. Many slide-out awnings operate automatically with the slide, but if yours is manual, make it a habit to check the awning every time you open or close your RV extension.
Installing a slide out awning might seem technical, but it’s doable—even for first-time RV owners. With the right tools, patience, and attention to detail, you’ll add a functional upgrade that protects your rig and enhances every future adventure. Think of it as a one-time effort that pays off with cleaner, drier, and more worry-free travel for years to come.
Zameniti link sa ovim – https://www.carefreeofcolorado.com/rv-products/slideout-awnings/